Sunday, March 11, 2012

Underwood Family Farms Tour

Remember my last post when I claimed to have a double-header post coming over the weekend? That did not happen. Sorry, but sometimes these things cannot be helped. I have a backlog of posts building up again, and I will try to work through those in the next few weeks, but Finals are coming up, so no guarantees.

Today's post is not actually about baking, but rather an excuse for me to post some fun, colorful pictures from my tour of the Underwood Family Farm in Moorpark, CA. I spent a day on the farm two Fridays ago through a trip organized by my school's Sustainability Club. Perks of this trip included a chance to get out of the city, learning about the farm, and picking my own veggies straight from the field.

After college, I started having much more control over what I ate on a daily basis. Don't get me wrong, I loved the fried delights of Thursday Pub Night and eating my way through Sunday brunch spreads, but those meals weren't doing much for my overall health.  When I came back to California and started working at Google, I started to eat much more healthfully, and also became very interested in the food supply chain. I've found that food tastes better and makes me feel happier when it is fresh, flavorful, and nutritious. 


Enough preaching. Here are some of my favorite pictures from my excursion:


This particular pig is a cool 750 lbs. Can you imagine?!


Finally, here are some pictures of the kale chips and roasted beets that I made from my farm bounty. I actually planned to make/roast these over the weekend and eat them during the week, but they tasted so good I ate everything in one day. At least I don't  have to feel guilty about eating delicious, nutritious vegetables!

Saturday, March 3, 2012

Chocolate glazed chocolate donuts

I have another double-header post coming up this weekend (assuming I don't get bored, distracted or just plain lazy about blogging), so I'll try to keep this one short. (By the way, I have been playing around with the layout of this blog, and made it just a tad wider to accommodate larger pictures. I hope they make you drool just a little bit more!)


One of the reasons I haven't baked (and consequently, blogged) as much this quarter is that my learning team hasn't been meeting as frequently as we did during Fall Quarter. I try not to bake for myself, because then I end up eating the whole batch myself, which isn't very good for me. However, last weekend, my section had a BBQ on Saturday, so I decided it was time to make some donuts... Baked ones, of course.


I found a recipe by searching on Pinterest for the most delicious looking baked chocolate donuts I could find, and eventually settled on a recipe from a blog called The Milkman's Wife


As an aside, have I mentioned that Pinterest is my new favorite way to both discover new recipes and keep track of things I want to try making? I've tried various recipe organization tools over the years, from old-fashioned paper print outs, to Google Docs to Springpad, but none of them really stuck. These other options were either too time consuming, too difficult to organize, or too far outside my daily routine to be efficient or effective. By contrast, I'm really loving Pinterest, because I can browse the Food & Drink section to get new ideas, but I can also pin recipes from across the web (using my handy dandy Google Chrome extension!), all to one board.


Okay, enough geeking out. Let's get baking already!


I'm going to be honest -- these baked donuts are not as dense as real cake donuts (which I love). They're closer to a cupcake in the shape of a donut. But they're still tasty, and they look delectable with a coat of shiny, smooth chocolate glaze. At first, I was disappointed that I didn't have time to get colored sprinkles to make these a bit more festive, but after I started glazing them, I decided that they looked pretty just with the glaze. What do you think?


By the way, this recipe is SUPER fast and easy -- another plus in my book! Here's the recipe, which I found on The Milkman's Wife.


INGREDIENTS
3/4 cup flour 
1/4 cup dutch-process cocoa 
1/2 cup sugar 
1 tablespoon baking powder 
1/4 teaspoon salt 
1 egg 
1/2 cup milk 
1 teaspoon vanilla 
4 tablespoons canola oil 
Colored or chocolate sprinkles (optional) 


1/2 cup semisweet chocolate chips 
2 tablespoons butter 
1 tablespoon corn syrup 
1/4 teaspoon vanilla extract 


DIRECTIONS
Preheat the oven to 450 degrees and coat a donut pan liberally with cooking spray. 
Stir together flour, cocoa powder, sugar, baking powder and salt in a large bowl. Add the egg, vanilla, and milk and stir together for 1 minute. Add the oil and continue to whisk until just combined. 


Transfer the batter to a large measuring cup (or a bowl with a spout) for easy pouring. Fill each cavity in the pan 2/3 of the way full with batter. 


Bake for 7 to 9 minutes or until the donuts spring back when lightly touched. Cool completely before icing. 


While the donuts are baking, prepare the chocolate glaze. Combine the chocolate chips, butter, corn syrup and vanilla extract in a double boiler (or in a stainless steel or glass bowl over some simmering water). Stir until the chocolate is melted and everything is incorporated. Use immediately.


Tuesday, February 21, 2012

Pie for procrastination

Ugh! I'm super behind on both baking and blogging, and unfortunately, I don't think I'm going to be able to whip anything up in my kitchen until at least Friday. Wah! :(  In fact, I should be studying for the midterm I have tomorrow, but I'm so sick of discount factors and yields to maturity that I had to take a break. What better break than to blog about pies gone by?


I joined a food-related social club at school this year, and although the club isn't super active, we do have pretty fun potluck board meetings! For our most recent meeting, I made a lattice top apple pie (swoon!). Why? Well, because...
As you can see, I'm still goofing off with my Wacom tablet as well. 

There wasn't anything terribly unusual about this particular pie... OH WAIT, except the fact that it was both DELICIOUS AND BEAUTIFUL!
I don't have time to type up the recipe, but of course, it was from the Flour cookbook. Speaking of which... According to her Twitter account, Joanne Chang is working on a savory cookbook, which is unbelievably fantastic. If it is everything I'm dreaming, it will be the best thing that happens to my life, and simultaneously the worst thing that happens to my waistline and my grades.

OKAY.

I should get back to studying, but before I do, here is how I made this pie, starting from when I baked the crust... Roll footage!

Okay, okay... Back to studying... Sorry today's post was so spazzy! I've got finance on the mind. :)

Tuesday, February 7, 2012

Super Bowl Sugar Cookies

I don't follow football super closely these days (I'm more of a baseball kind of gal), but it wasn't always that way. In the mid-90s, many a Sunday I could be found jumping around the living room, yelling at the TV, cheering on my beloved San Francisco 49ers. I remember those afternoons vividly because my brother and I had fencing practice at 4:30pm every Sunday, and we always begged Mom and Dad to let us watch one more down before we had to run out of the house. As a kid, I idolized Steve Young and Jerry Rice, I despised the Cowboys, and I thought George Seifert was infallible. Until he became a Panther, that is. This year, for the first time in almost a decade, the Niners made me feel like a kid again. So even though they didn't make it to the Super Bowl, I'm excited to be seeing red and gold again. 

Now then, that's enough nostalgia for a Sunday night...

My classmates had a some people over for the game, and in keeping with the theme, I decided to make football-shaped sugar cookies. I usually avoid sugar cookies because after the first tray, I inevitably grow weary of the "roll, cut, decorate, bake, repeat" routine. Also, the nagging perfectionist in me hates it when the cookies get deformed during the transfer stage between cutting board and cookie sheet. 

But this was special, so I decided to bust out my rolling pin and give it a whirl. I planned to frost the cookies with chocolate icing and use white icing to draw on the laces, but what about cutting the cookies into footballs? I thought about buying a biscuit cutter and pinching the sides to make a football shape, but that would have require advance planning and a trip to the cooking store. Ex-nay. Then I considered cutting a football-shaped template and using it as a guide, but I couldn't be bothered to find an appropriately clean piece of cardboard. Ex-nay. So... what's left? Free-hand, of course! A little knife work is good for keeping nimble fingers, I say.


Here is a drawn recap of how I cut all those footballs, courtesy of my brand new Wacom Bamboo tablet! First, I cut circles of dough using a coffee mug, then I lightly scored each circle with a cross. I used the score lines as a guide to cut symmetrical shapes (well, almost symmetrical), then I loaded up the baking sheet and popped those suckers in the oven!

After the cookies cooled, I frosted them with chocolate icing, then drew on the laces using white icing. If I had to do these cookies again, I think I would have rolled the dough a little bit thicker and baked them a little bit less, because I like my sugar cookies a little but soft, but to be perfectly honest, these were more about the looks. So how *did* they look? See for yourself! Here are the results, in full HD!


And here's the cookie recipe, courtesy of the Flour Bakery Cookbook, as well as an icing recipe that I made up:

Ingredients


1 cup (2 sticks) unsalted butter, at room temperature
1 1/2 cups granulated sugar
2 eggs
1 tablespoon vanilla extract
3 cups unbleached all-purpose flour
2 1/2 teaspoons baking powder
1/2 teaspoon kosher salt


1 cup confectioners sugar
3 tablespoons milk
1 teaspoon vanilla extract
1/4 cup chocolate chips


Directions


Cream together the butter and granulated sugar for about 5 minutes using a stand mixer (or 10 minutes by hand with a spoon, like me!). Beat in the eggs and vanilla.


In a medium bowl, stir together the flour, baking powder and salt until well mixed. Slowly blend the flour mixture into the butter-sugar mixture and then mix just until the flour mixture is totally incorporated and the dough is evenly mied.


Scrape the dough onto a sheet of plastic wrap and wrap the dough in the plastic wrap, pressing down to form a disk about 8-inches in diameter and 1-inch thick. Refrigerate dough for about 1 hour, or until it firms up enough to roll out (I did mine overnight and it warm up on the counter before rolling out).


Preheat oven to 350 degress.


Roll out your dough, cut out your shapes, and place them on a cookie sheet. Bake for 12 minutes, or until the edges turn brown but the centers are still pale. Let the cookies cool for 30 minutes on the baking sheet, then transfer to a wire rack.


While the cookies are cooling, mix together confectioners sugar and milk. Remove 1/4 of the icing and set aside.  Melt the chocolate chips, and mix into the larger portion of the icing. Using a pastry bag filled with the chocolate icing, draw the outline of a football on each cookie, then fill in with more chocolate icing. Once the chocolate icing hardens, draw on the football laces using the remaining white icing.

Wednesday, January 25, 2012

Coocoo for cocoa brownies

After four years of working at a tech company that provided me with three hot meals a day and unlimited snacks, I sometimes find myself at a loss when I arrive home in the evening and stare blankly at the raw contents of my refrigerator. So much food, nothing to eat.

I'm genuinely trying to cook more often (there may be an entree-focused blog post in my future), but around the middle of last quarter, I decided that an interim solution to this problem was to sign up for as many free-food events as my schedule would permit. Generally speaking, this translates into me eating a lot of pizza for lunch... But last Friday, I actually got dinner! The lasagna wasn't anything to write home about, but my heart skipped a beat when I saw brownies waiting at the end of the buffet.

Sadly, the brownies that night were completely mediocre. 

However, they did inspire me to bake up a batch of my own. Years of research (read: eating) have taught me that brownies vary in quality along three scales: density, taste, and texture. My ideal brownie is soft, but not cake-like, has an intense chocolate flavor, and contains just enough bite to vaguely resemble fudge, while still leaving baked-goods-style crumbs on your fingers. Here is a graphical representation, which should clear up any remaining confusion:


When I stumbled on the Alton Brown recipe that I eventually used, it felt like a "palm-to-forehead" moment. I've been a fan of Alton Brown for many years (in fact, my old roommate secured me an autographed DVD set of Good Eats, which remains one of my most prized possessions), but it has been a long while since I've used one of his recipes. When I saw the ratings for his cocoa brownies, I knew I'd found my match.

And as usual, Alton came through for me.
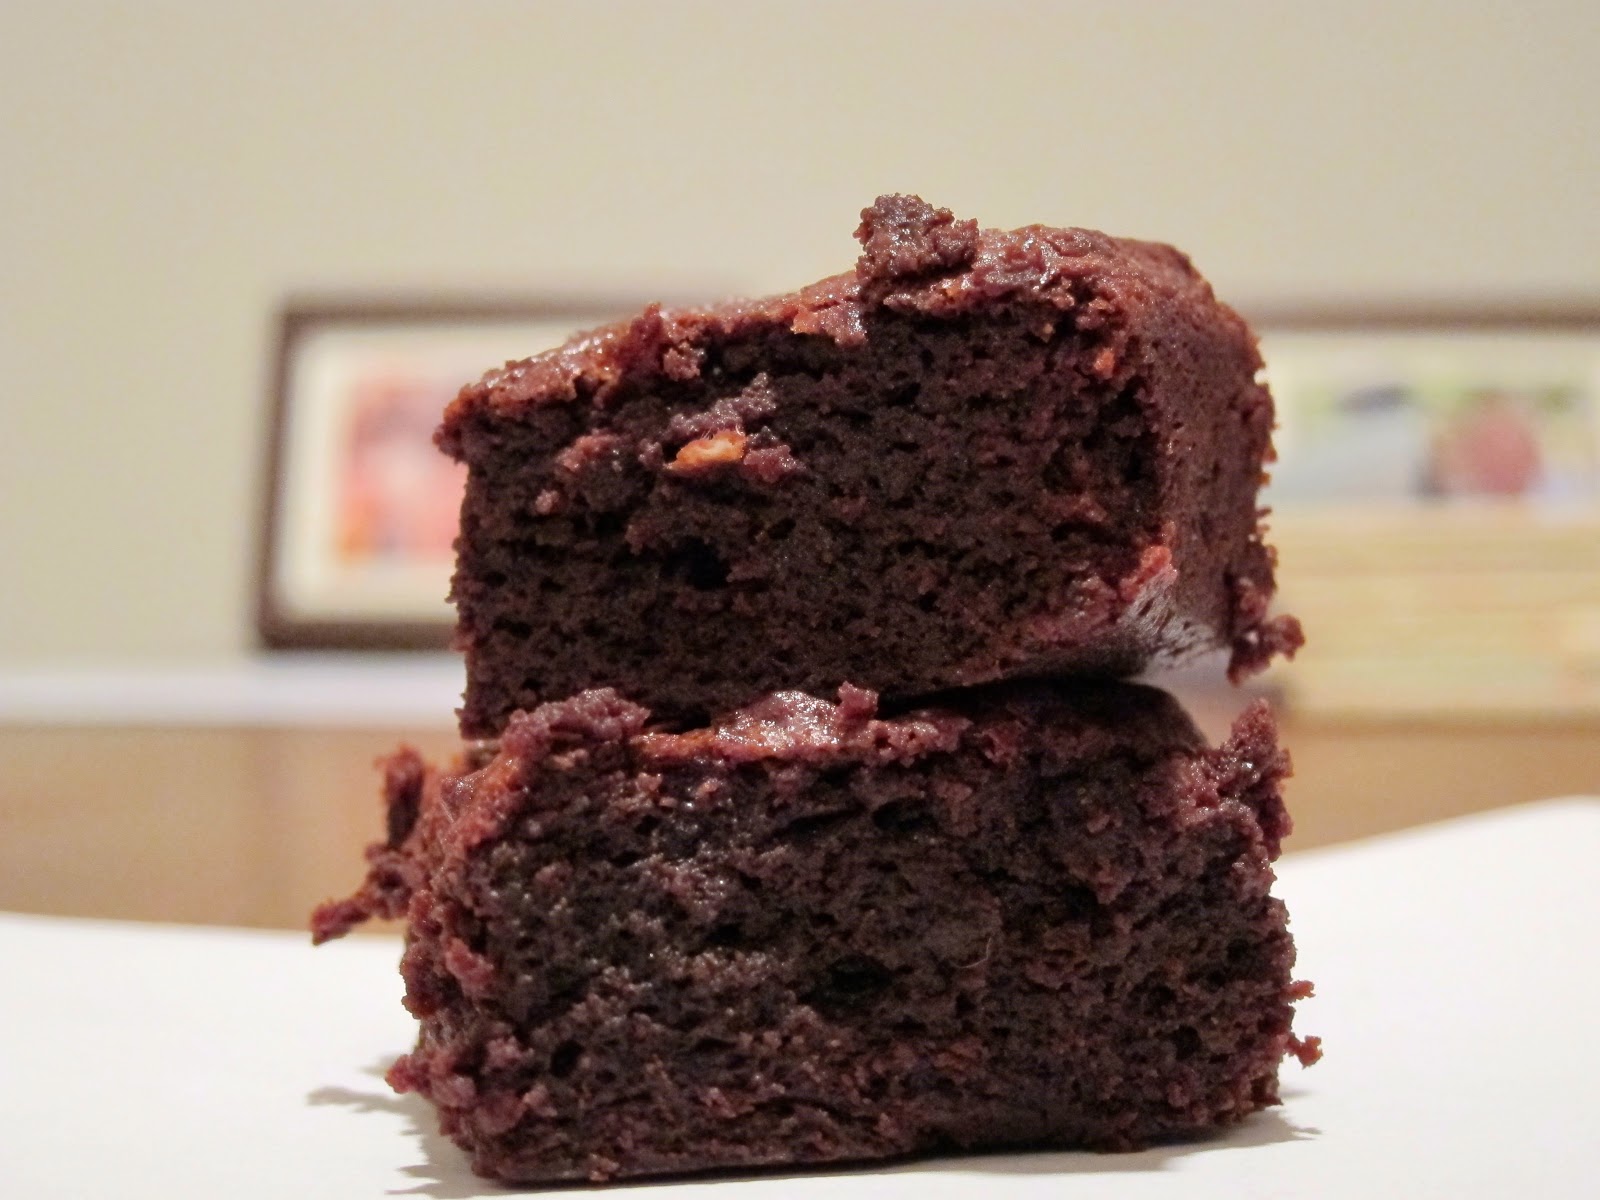
These brownies are awesome, and I didn't make a single substitution this time. Why mess with perfection? I did watch Alton's video, which provided more specific instructions for mixing in the melted butter than the written directions, so I've slightly altered the directions below. Additionally, I lined the baking pan with parchment instead of the traditional butter-flour combo -- it made removing the brownies a breeze, which is always a pain.

And as one last aside, bar cookies baked in a 8x8 inch pan have the added benefit of being able to fit PERFECTLY into a gallon size ziplock back. Who knew? I hope my classmates are ready for some brownies!

Alton Brown's Cocoa Brownies (source):

Ingredients

  • 4 large eggs
  • 1 cup sugar, sifted
  • 1 cup brown sugar, sifted
  • 8 ounces melted butter
  • 11/4 cups cocoa, sifted
  • 2 teaspoons vanilla extract
  • 1/2 cup flour, sifted
  • 1/2 teaspoon kosher salt

Directions

Preheat the oven to 300 degrees F. Line an 8-inch square pan with parchment paper.
Beat the eggs at medium speed until fluffy and light yellow. Add both sugars. Sift in the rest of the dry ingredients. Slowly mix in melted butter, adding gradually so that it doesn't pool on top of the batter. Mix to combine.
Pour the batter into the parchment-lined 8-inch square pan and bake for 45 minutes. Check for doneness with the tried-and-true toothpick method: a toothpick inserted into the center of the pan should come out clean. When it's done, remove to a rack to cool. Resist the temptation to cut into it until it's mostly cool.

Sunday, January 22, 2012

Chocolate chip donuts: out of the fryer, into the oven

Hey kids, it's story time!

Back in elementary school, I went to after-school daycare at the local Jewish Community Center. I'm not Jewish, so I don't know how Mom decided this would be the best place for me to spend my afternoons -- I suspect it had something to do with the Center's proximity to our house, the prevalence of Challah bread, or my last name, but I cannot say with certainty. 

I liked the JCC well enough, but one thing I found very odd was that I seemed to be the only kid from my elementary school (literally, the only one) who went there.  I felt this most acutely in kindergarten, when my school was the first stop on the JCC bus route and every day I rode an enormous school bus with just one other person: the driver. This turned out to be rather fortuitous, though, because the bus driver also worked at a donut shop and sometimes brought leftovers for us kids. As the lone rider, I always got to pick first from the vast array. (As an aside, I ended up becoming friends with my driver, to the point where he gave me a pack of crayons for Christmas and I drew him a thank you card. I wonder what happened to him...)

All of this is just a long way of saying that while I wouldn't call myself a donut fanatic, and I very rarely crave donuts, I still feel like a kid when ever I go into a donut shop and get to pick whatever kind I want. And, of course, there are times when donuts can be truly and utterly divine.

I much prefer dense donuts to regular ones -- chocolate old fashions are my donut Achilles' heels (I also like blueberry cake ones, which I know is really weird, but I think it's because I just like anything with blueberries) -- so this year for Christmas, I asked for a donut pan. 
I've always been intrigued by the idea of baking donuts instead of frying them, and I've seen recipes for baked donuts floating around over the years, so the concept has been in the back of my mind for a while. When I got back to LA, a recipe for baked donuts popped up on the King Arthur Flour company blog, so it seemed the time had come to break in the new pan.

As usual, I did not follow the recipe to a T. I didn't have nutmeg, so instead I used pumpkin pie spice -- I think it still tasted good, but I guess purists might beg to differ. Additionally, I don't usually keep milk on hand because I'm lactose intolerant; I ended up using soy milk, which is a frequent substitution for me. Finally, I only had regular sized chips, and that seemed too big for the donut proportions, so I chopped up the chips into smaller bits. I also sprinkled a little bit of chocolate in the bottom of each donut mold, which tasted good but didn't turn out to be as visually appealing as I'd pictured in my head.

Here's the final product:
Verdict: I'm going to call a spade a spade on this one -- baked is not the same as fried, but you know what? They were pretty tasty nonetheless. These ones puffed up nicely, so they LOOKED like donuts at the very least, and they were not too hard or dry, which seemed like the biggest potential pitfall in my book. The texture is not quite as dense and crumbly as a cake donut, but not quite as fluffy as a real cake. One of my classmates compared it to coffee cake, which I interpret as a positive feedback. 

And the final test: will I make these again? I think so! I'm looking forward to trying other variations though -- maybe with blueberries. ;)

Here is the recipe, adapted from King Arthur Flour Company's blog (I actually made a half-recipe for 6 donuts, but here are the proportions for a whole dozen):

Ingredients
1/4 cup (4 tablespoons) butter
1/4 cup vegetable oil
1/2 cup granulated sugar
1/3 cup brown sugar
2 large eggs
1 1/2 teaspoons baking powder
1/4 teaspoon baking soda
1 teaspoon pumpkin pie spice
3/4 teaspoon salt
1 teaspoon vanilla extract
2 2/3 cups AP flour
1 cup soy milk
3/4 cup semisweet chocolate chips, chopped into bits
Directions
1) Preheat the oven to 425°F. Lightly grease two standard donut pans.
2) In a medium-sized mixing bowl, beat together the butter, vegetable oil, and sugars until smooth.

3) Add the eggs, beating to combine.

4) Stir in the baking powder, baking soda, spices, salt, and vanilla.

5) Stir the flour into the butter mixture alternately with the milk, beginning and ending with the flour and making sure everything is thoroughly combined.

6) Sprinkle some chocolate chip bits into each donut pan, and stir the remaining chopped up chocolate chips into the batter

8) Spoon 1/2 the batter into a lightly greased doughnut pans, filling the wells to the rim for chocolate chip doughnuts.

9) Bake the doughnuts for 10 minutes. Remove them from the oven, and wait 5 to 7 minutes before turning them out of the pans onto a rack. Repeat chocolate sprinkles and baking process for second 1/2 dozen. Enjoy warm; or cool completely, and store airtight.

Tuesday, January 17, 2012

Chocolate-on-chocolate revisited

My love affair with chocolate goes way back, but it has evolved over the years from the snack sized Crunch bars you get at Halloween (heavily influenced by Shaq's early endorsement of said candy), to the purest, darkest artisan chocolate bars I can get my grubby little hands on. 

My current favorite is the Costa Rica 70% from Dandelion Chocolate. Its toasty at first, and then gradually becomes tangy, almost citrus-like, all with a super rich chocolate base. If you ask me, it's pretty amazing that so many flavors can be extracted from a bean! If you like chocolate, even just a little bit, I highly recommend Dandelion. Hurray for supporting local businesses!


So, along with my growing chocolate obsession, my quest for the perfect chocolate-on-chocolate continuesMy last attempt at C-on-C cookies was super chocolatey, but the texture left something to be desired. This time around, I got closer to perfection.
When I first took these out of the oven, they were so soft that I thought they might break if I tried to pick them up. But after I let them cool for a bit, they became cookie-chewy, which is just to say that they break easily and melt in your mouth, but don't crumble when you try to move them. One thing I really liked about this recipe is that the batter includes melted chocolate, not just cocoa powder, which gave the dough some extra chocolate depth.
As far as distribution, this batch worked double duty -- I brought them to a potluck and also gave them to a friend for her birthday. But perhaps even more interesting, I  recently discovered that leaving chocolate chip cookie dough in the fridge for a couple of days before baking improves the cookie texture immeasurably -- it gives the flour time to soak up the liquids, so you get insanely tender, flavorful cookies. I've been wanting to try it with other cookies, so when I made these last week, I wrapped some extra dough in parchment and stuck it in the fridge. I pulled out the dough today and baked up the remaining three cookies. Verdict: AMAZING.

Here's the recipe, which I found on Lovin From the Oven:

INGREDIENTS


2 2/3 cups (16 oz) semisweet chocolate chips
1 cup all-purpose flour
1/4 cup cocoa powder (I used Hershey's dark)
1 teaspoon baking soda
1/2 teaspoon salt
1/2 cup unsalted butter, slightly softened
1/2 cup packed brown sugar
1/4 cup granulated sugar
1 cold egg
2 teaspoon vanilla

DIRECTIONS

Heat oven to 325 degrees.

Melt 2/3 cup of the chocolate chips in the microwave by heating in increments of 30 seconds and stirring in between. Set aside.
Cream together the butter and both sugars. Stir in the melted chocolate chips. Add in the egg and vanilla.
Add the dry ingredients (flour, cocoa powder, baking soda, and salt) to the chocolate mixture until just incorporated.
Fold in the remaining 2 cups chocolate chips.
Scoop tablespoon sized dough onto baking sheets.
Bake for about 11 minutes. Let cool for 5 minutes before transferring to a wire rack.